Canning Season will soon be here! Here are 5 simple but useful tips to get started canning this year’s bounty!
- Start with a research-tested recipe. Just because a recipe is in print, doesn’t mean it’s safe for you and your family. Start with a recipe that has been tested to make sure that the product is safe and high quality. A great place to begin is with the recipes from the National Center for Home Food Preservation uga.edu/nchfp/ . Wisconsin has recipe books that have been developed to ensure safe canning no matter where you live in the state (see the Recipes tab): https://fyi.extension.wisc.edu/safepreserving/edu. Or call the Richland County UW-Extension office (647-6148) to obtain updated food preservation recipe booklets.
- Use recipes that are up to date. We all want to continue with those tried-and-true recipes, but canning recommendations have changed dramatically over the last 15 years. If you are using recipes that date before 1994, then it’s a good idea to set those aside and find an up-to-date recipe that has been tested for safety. Canning and food preservation questions can be directed to the Richland County UW-Extension Family Living Agent, Chelsea Wunnicke at 647-6148.
- Start with equipment in good working order. A boiling water canner should have a flat bottom, so that it fits nicely on the stove top, and a tight-fitting lid. A pressure canner will have either a dial-gauge or a weighted gauge. Dial gauge canners should be tested every year for accuracy. Richland County UW-Extension office will test dial gauge canners for free! Replace canner gaskets every 2-3 years. There is information to help you successful use your pressure canner: Using Pressure Canners uga.edu/nchfp/publications/uga/using_press_canners.html ***And one final note on canners, don’t use a pressure cooker, sometimes called a pressure saucepan, as a pressure canner. A pressure canner holds a minimum of 4-quart jars and has a pressure regulator capable of measuring up to 15 pounds of pressure.
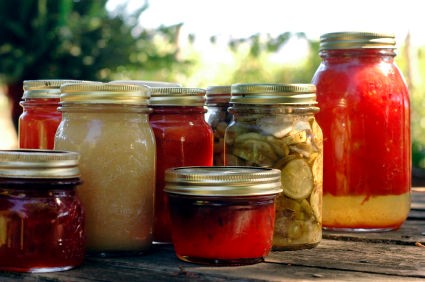
- Assemble jars and other items. Use only standard home canning jars, not old mayonnaise jars, and check these to make sure they are not chipped or cracked. Always use 2-piece lids; purchase lids new each year (the sealing compound will break down on storage) and sort through screw bands to make sure they are not rusted. It’s fine to reuse canning jars, as long as they are not chipped or cracked. Garage sales can be great places to locate used canning jars, just make sure they were designed for canning. Other items that come in handy for home canning include jar fillers, tongs, and lid wands.
- Leave your creativity behind! Home canning is one area where being creative can lead to food safety disasters. So begin with an up-to-date, research-tested recipe and carefully follow the directions. Don’t make ingredient substitutions, unless they are allowed, and follow the recipe directions through all the steps. Don’t substitute dishwasher canning, oven canning, or open-kettle canning for an approved canning method – boiling water canning or pressure canning.
And remember, at the end of the day, a sealed canning jar does not indicate that the food inside is safe. A sealed jar simply means that the jar is sealed. You can do a lot of things wrong and still get a jar to seal! Follow these easy steps for safely preserving your garden’s bounty to enjoy all year round.
Information provided by B. Ingham, May 2011.
If you have any questions, please feel free to call Chelsea Wunnicke at the Extension Office at 608-647-6148 or email: chelsea.wunnicke@wisc.edu